I don't know if I've told y'all this, but Mr. Snoop is not only a medical student, he is also getting his Masters of Public Health. Because medical school is not hellish enough as is. Anywho, I'm really super proud of him, but the MPH means that he has classes at night in addition to his rotations. The other night, instead of sitting on my butt and watching the E! True Hollywood Story: Casey Anthony, I decided to sit on my butt and watch the E! True Hollywood Story: Casey Anthony while making a crafty craft.
Here's what I made. For the record, these are not any of yall's Christmas gifts, but I think they'd make pretty good gifts: easy and cheap. Using the Michael's 40% off coupons, making 12 ornaments was under $10. Can't beat it. At least in Nueva York.
1. Start with a clear glass ornament. Like so. I got mine from Michael's on sale, yo. (rhymes!)
2. Then take some paint. Also from Michael's. The Great White North has severely limited craft store options. Oh how I miss you, Hobby Lobby. I used glitter, obviously. Why wouldn't you?
3. Take the tops off your ornaments (girls gone wild!) and then dump a bloop of your paint in the ornament. I don't have a picture of this step because I needed two hands. Swirl the bloop of paint around your ornament till it coats all sides. This takes a little while. I found that tapping the ornament in the palm of your hand helps spread out the paint.
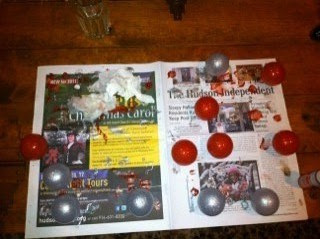
4. Then turn the ornament upside down on your crappy free local newspaper and repeat:
A lot of the paint will slide out of the ornaments. That's ok, it's all part of the process. You might want to move the ornaments around every so often so that they don't get glued to the paper by globs of paint. I let them dry overnight and they looked like this in the morning:
If you want your ornaments to have a more intense color, add a second coat once they have dried. And then swirl:
Here's what you can do with them once they've dried and you put the top back on...
If I were giving these as a gift, here's how I'd package them...
- In those little six-pack egg cartons with cute wrapping paper or even just a little ribbon
- Wrap one or two in a cellophane bag with a cute ribbon
- Use as an accessory for bows when you wrap gifts
- Nest in a cute tin with rafia.
Enjoy!


Love this and was so happy to get 40% off at Michael's as well for Hopsy's link up. Your blog is adorbs.
ReplyDeleteEmily, I made these a few years ago to punch up some non-Christmas tree decorations (garlands,etc). Instead of putting them down on paper, use the plastic holder the balls came in and let the paint come out. You can also move them around while they dry to get a little spiral going. You can also use an empty egg carton to hold them up, they give more of a well to hold the excess paint.
ReplyDeleteFantastic job and I can't wait to use the Martha glitter and metallic craft paints!